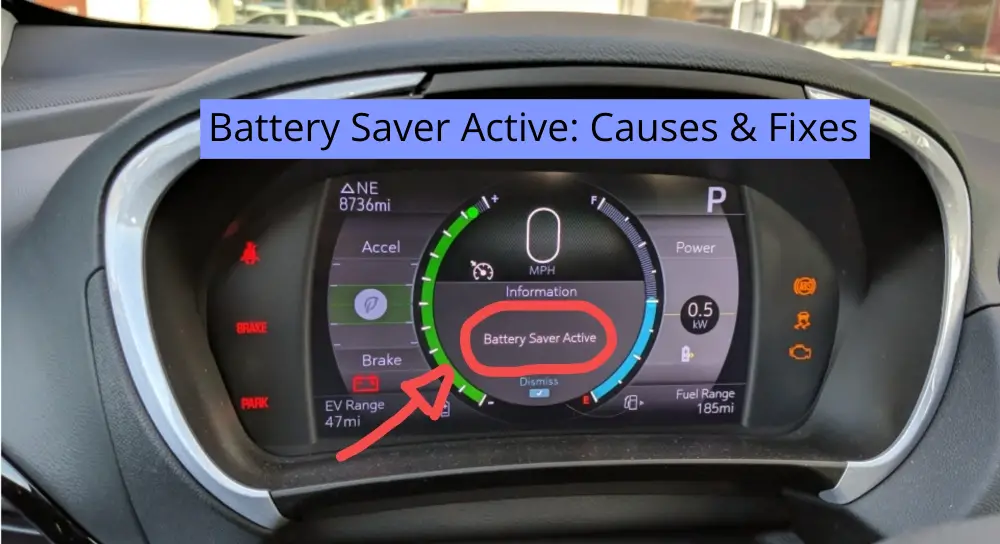
Nothing is more agonizing than driving down the road, and a warning light illuminates the car’s dashboard.
The Battery Saver Active feature is a common warning light that you may have seen but did not understand. So, if you’re Battery Saver Active warning light is on, here are the common causes and fixes!
The Battery Saver Active function will trigger when the car’s ECU detects that more current is leaving the battery than what it is being replenished with. This could result from a faulty battery or alternator, damaged wiring, or a defective battery current sensor.
Read on to discover what may cause the Battery Saver Active feature to trigger, how it functions, and how to fix some common faults.
What Does Battery Saver Active Mean?
The Battery Saver Active function is a system that monitors the voltage from the battery and alternator.
If the Battery Saver Active warning light is illuminated on the vehicle’s dashboard, it means that the battery or alternator cannot supply sufficient power to all the vehicle’s electrical systems.
The battery Saver does what the name suggests. It saves as much of the battery’s power as possible. It does this by only supplying critical electrical systems with electrical power.
This means that some of the following systems may not function:
- Stereo or entertainment system
- Power windows
- Interior reading lights
- Heater function
- Heated seats
- Heated steering wheel
- A/C system
The battery sensor works with the vehicle’s Electrical Control Module (ECM) to get a very accurate reading.
If the reading is low, then the ECM will activate the battery saver. The warning light will illuminate, indicating a problem with the vehicle’s charging system or battery.
What Can Cause The Battery Saver Active Feature To Trigger?
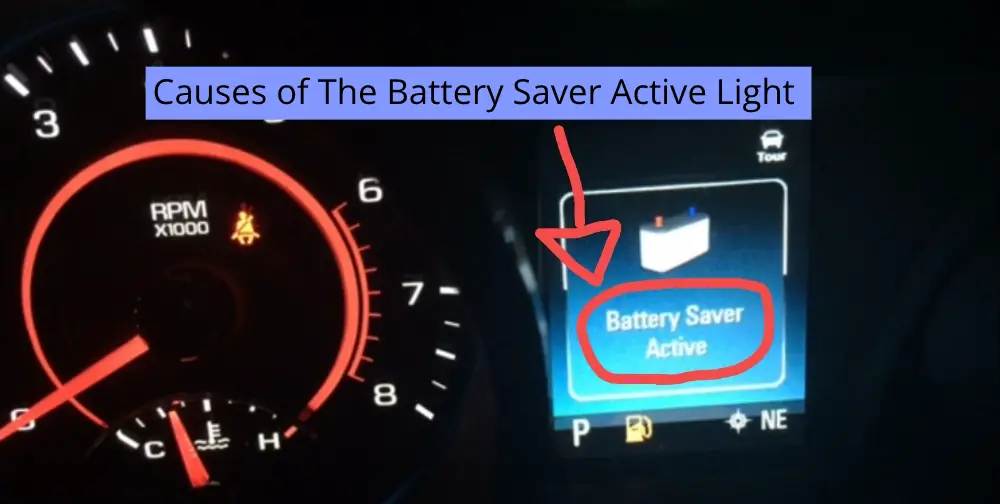
Several things may trigger the Battery Saver Active feature. The following are common faults that may trigger this feature.
Battery Cables
The first thing to check when the Battery Saver Active has triggered is the battery cables. Check to see if any noticeable broken wires are running from the battery.
If the cables are not damaged, then inspect the battery terminals. The battery terminals often have corrosion, dust, and debris on or around them. Clean the terminals and see if the Battery Saver light goes out.
Damaged Or Old Battery
An old or damaged battery is the most common reason the Battery Saver Active function triggers. This may be due to the battery not holding its charge and not being able to supply a high enough voltage.
If the battery has less than 12.4 volts, the battery sensor will relay this information to the ECM and trigger the warning. It will then shut down the non-essential features of the vehicle.
There are several reasons why a battery will not hold its charge. These are:
- Expired battery
- Burn Cell
- Not sufficient electrolyte in the battery
- Damaged battery terminals
If you suspect the battery is faulty, test it with a multi-meter. The voltage should be above 12.4 volts while no systems are running. Check the expiry date of the battery; if it is expired, it should be replaced.
Faulty Battery Current Sensor
The battery current sensor sends information about the status to the ECM. It will trigger the Battery Saver Active feature if it senses more electrical current leaving the battery than what it is currently receiving from the charging alternator.
If the battery current sensor is faulty, it will send conflicting information to the vehicle’s ECM, activating the Battery Saver Active feature. The sensor may have become loose if the car has been driven on a bumpy road; if so, it will not function correctly.
The battery current sensor can be located by the battery. It will be connected with a thinner wire or directly to the negative battery terminal.
Faulty Alternator
If the Battery Saver Active warning light illuminates while driving, it strongly indicates that it may be a faulty alternator.
If the engine is running and all the vehicle’s electronics are running, the alternator should still produce a minimum of 13.0 volts. It must produce this voltage to supply power to the vehicle systems and charge the battery.
When the alternator is incapable of charging the battery, the battery will drain, causing the Battery Saver Active feature to trigger. The alternator should be replaced if it is faulty, as it is a vital component.
Ways To Fix The Battery Saver Active Feature
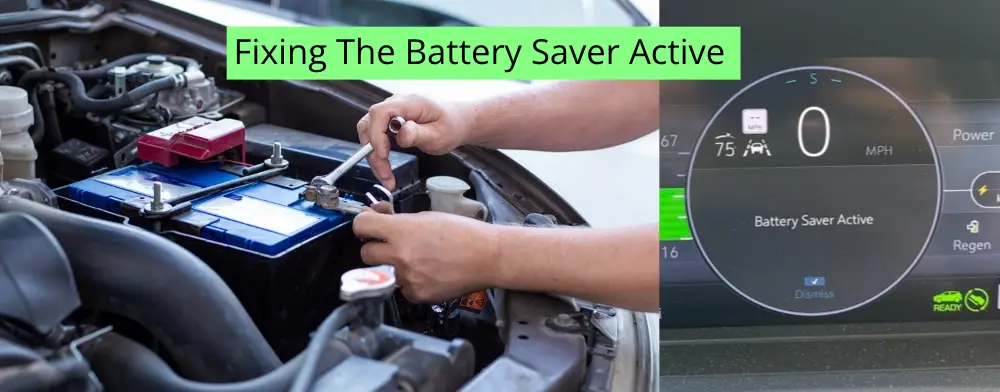
There are many ways to fix the four common causes that may trigger the Battery Saver Active feature. There is no quick fix to turn this feature off.
The only way to stop the warning light is to rectify the problem. This can be done by anyone that considers themselves a bit of a DIY enthusiast.
Test The Battery And Alternator Using A Multi-Meter
If there are doubts that a car’s battery or charging system is not functioning correctly, testing it with a multi-meter will prove this.
Follow these steps to test the voltage of the battery and alternator with a multi-meter:
Step 1: Multi-Meter Settings And Using The Correct Probes
Turn on the multi-meter and select the “20DC volts” setting. If the multi-meter does not have a voltage increase setting (2, 20,200), select the “voltage DC” setting.
Place the correct color probe on the corresponding color terminal. The black-probe to the negative (-) battery terminal, and the red-probe to the positive (+) terminal.
Step 2: Test The Battery With The Engine Off
Test the battery voltage with the vehicle engine off. The voltage should register between 12.6 and 12.8 volts, indicating that the battery is fully charged.
If the voltage registers lower than 12.5 Volts, charge the battery with a battery charger to full capacity before continuing the test. Test the battery again after it has been charged.
If the battery voltage is lower than 12.3 volts, the battery is damaged and will not hold its charge. Replace the battery as soon as possible.
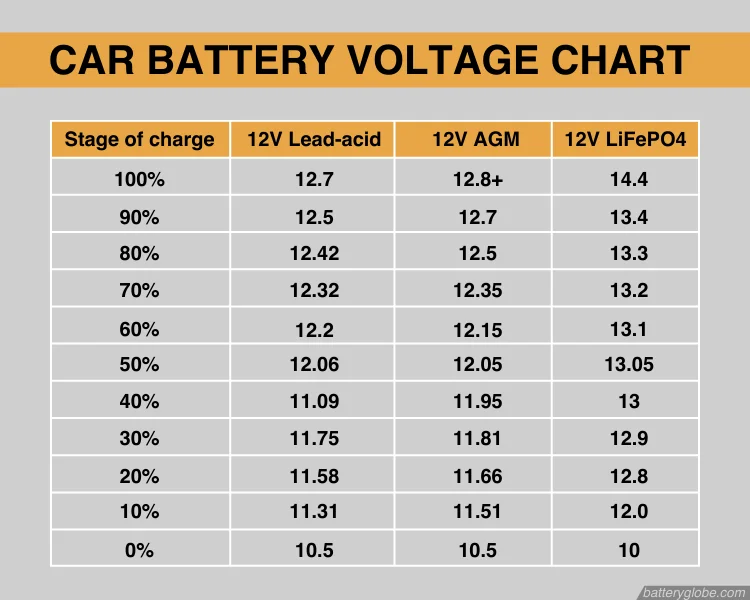
The following table indicates the battery’s charge percentage and status.
| DC Voltage Reading | Battery Charge Percentage | Battery Status |
| 12.71 volt | Battery charge at 100% | Healthy |
| 12.51 volt | Battery charge at 90% | Healthy |
| 12.42 volt | Battery charge at 80% | Good |
| 12.32 volt | Battery charge at 70% | Charge the battery as soon as possible |
| 12.21 volt | Battery charge at 60% | Charge the battery to prevent damage |
| 12.06 volt | Battery charge at 50% | Replace – Battery may have burnt cells |
| 11.09 volt | Battery charge at 40% | Replace – Not holding charge |
Step 3: Test The Battery With The Engine On
Start the engine and switch off the vehicle’s lights, A/C, stereo, and accessories. Test the battery voltage once again.
The multi-meter should register an increased battery voltage while the engine is running. This charging voltage should not exceed 15.4 volts on the multi-meter.
If the battery voltage is above 13.8 volts and less than 15.4 volts, the alternator and voltage regulator are working as intended.
If there is no increase in charge voltage, the vehicle should be taken to a professional auto-electrician to diagnose the problem.
Cleaning The Battery Terminals
Cleaning the battery terminals ensures that there is always a good connection. This can be done easily and will only take a few minutes. A few items will be required to clean the battery terminals correctly.
- Baking Soda
- Jug with water
- Waste cloth
- Petroleum Jelly
- An old toothbrush
Step 1: Disconnect The Battery Cables
Remove all the battery terminal covers and disconnect all the cables; disconnect the negative side first.
Step 2: Dust Baking Soda On Battery Terminals
Generously dust baking soda on the battery terminals and cable connectors. The baking soda should cover areas where there is noticeable corrosion.
Step 3: Add Water To The Baking Soda
Add some water to the baking soda covering the terminals and battery connectors. This will start the reaction between the corrosion and baking soda. The baking soda neutralizes the battery’s acidic corrosion, making it safe to handle.
Step 4: Scrub The Terminals
Use an old toothbrush to scrub any residual corrosion from the terminals. Apply more baking soda and water if needed.
Step 5: Rinse With Water
Once all the corrosion is cleared away, rinse the terminals, battery cable connectors, and the top of the battery thoroughly with water. Dry the battery with the waste cloth, ensuring all the moisture is gone.
Step 6: Lubricate The Battery Terminals
Coat the battery terminals with a thin layer of petroleum jelly. This will help lubricate the terminals and prevent further corrosion from build-up.
Step 7: Reconnect The Battery Cable
Reconnect all the battery cables and replace the terminal covers.
Replacing The Battery Current Sensor
Replacing the battery current sensor may be necessary if the battery, cables, and alternator are not at fault. This can be done with the following steps.
- Step 1 – remove the negative (-) battery cable from the battery terminal
- Step 2 – cut the tie straps and the electrical tape holding the sensor to the cable
- Step 3 – squeeze the negative battery’s branches together
- Step 4 – take note of the position of the old sensor on the cable
- Step 5 – gently slide the battery current sensor off the cable
- Step 6 – replacing the battery current sensor is a reversal of the removal steps
Conclusion
The Battery Saver Active warning light will illuminate if the battery cannot supply sufficient power to the vehicle’s electrical system. It will switch off unnecessary features such as the stereo, power windows, and A/C system.
Common causes that may cause this feature to trigger are damaged or loose cables, a faulty or outdated battery, a faulty alternator, or a defective battery current sensor. There are several methods you can follow to determine where the problem lies.